Step 1
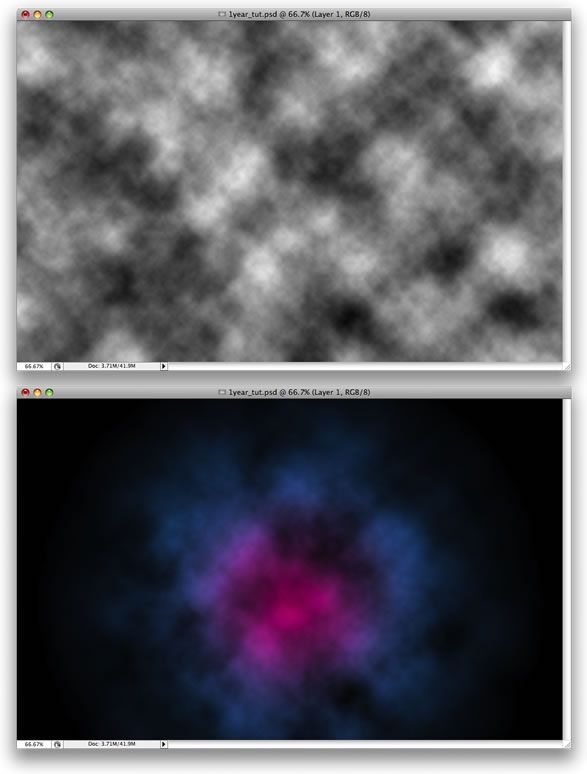
Create a new document. Double-click on the background layer to open the Layer Styles dialog box. Select Gradient Overlay. For the colors, use three colors: pink, blue, and black. Select Radial for the Style.

Step 2
Create a new layer and rename it to"ps clouds." Make sure that the foreground is white and the background is black. Go to Filters>Render>Clouds. Tip: Hold the "Alt" key to create a stronger effect.

Step 3
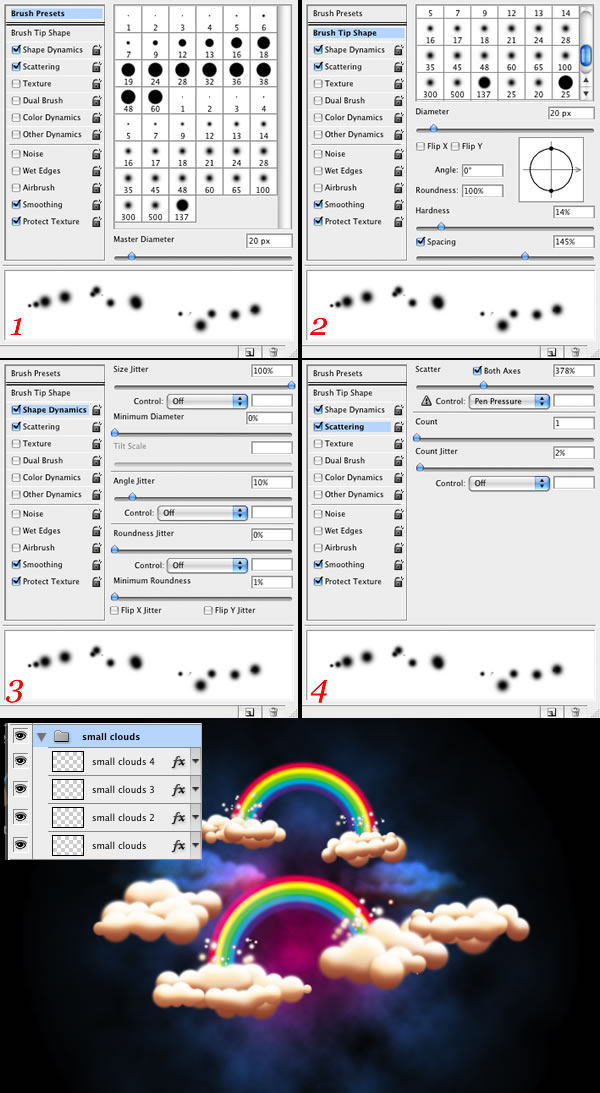
To create the clouds we will use the Brush Engine. Create a new Folder and name it "cloud." Select the Brush Tool and set the brush properties as shown below. The secret is the spacing and the Size Jitter. After that, you can save the brush.

Step 4
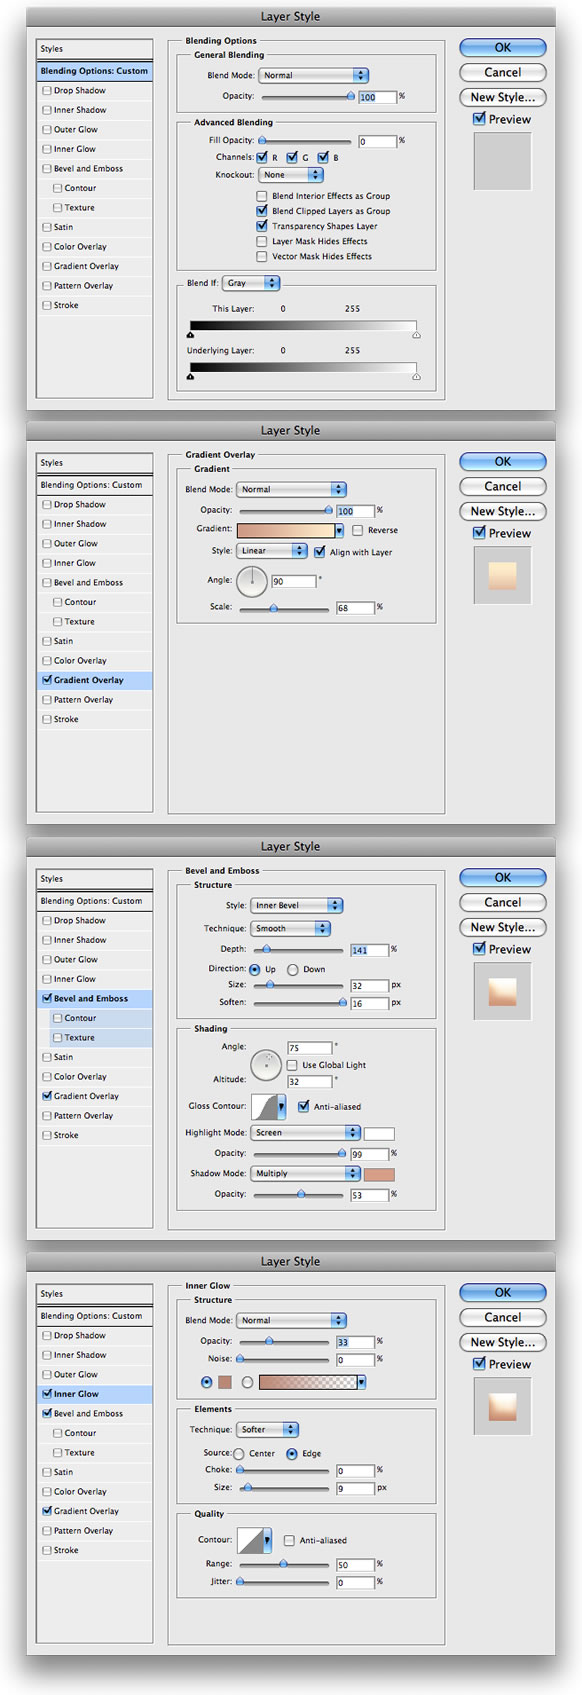
We have the brush—now lets create the cloud style. Create three new layers inside the "cloud" folder, and name them "front," "middle," and "last." Double-click on the "front" layer to open the Layer Styles dialog box and select Gradient Overlay, Bevel and Emboss, and Inner Glow. Copy the Layer Style and apply to the other two layers.

Step 5
Using the brush we created, start painting the clouds. Tip: The volume will be created using the layer order, like in the image below.

Step 6
After you've painted your cloud, select the folder and convert it to a Smart Object. Duplicate the layer and change the blend mode to Multiply. Group the two layers and rename it to "Cloud 1."

Step 7
Repeat Steps 4, 5, and 6. It's not necessary to repeat the Layer Style steps though, just Copy and Paste the Layer Style. Create four clouds and place them like in the image below.

Step 8
Select any cloud folder and convert it to a Smart Object. Change the Blend Mode to Overlay. After that duplicate the layer and group the two layers. Rename the group to "clouds back."

Step 9—Rainbows in Illustrator
In Illustrator select Ellipse Tool (L) and create a circle. Set the Stroke weight to 40px with a purple color.

Step 10
Start adding more strokes to the ellipse, increasing the weight by 40px so there will be a 40px purple, 80px cyan, 120px green, 160px yellow, and 200px red. After that copy the vector and go back to Photoshop.

Step 11
Back in Photoshop, paste the vector and choose Paste as Pixels. After that, using the Magic Wand Tool (W), select the white part of the rainbow and delete it. Then convert it to a Smart Object and group it. Rename the group "rainbow 1."

Step 12
Place the rainbow between two clouds and using the Polygonal Lasso Tool (L), select the part of the rainbow you want to hide. Then select the group (not the layer), and go to Layer>Layer Mask>Hide Selection and hide that area.
After that you can duplicate the "rainbow 1" group in order to create another rainbow.

Step 13
Create four new layers and paste on them the same Layer Style we used for the clouds. Select the Brush Tool and create another brush like the images below. Then create small clouds where the rainbows touch the clouds at the beginning and end of the rainbows.

Step 14
Create a new layer beneath the clouds and rainbows. Fill it with black and change the Blend Mode to Color Dodge. Again select the Brush Tool and create another Brush in order to create the stars.

Step 15
Repeat step 14; however, this time select a circle shape instead of the star. Reduce the size of the brush, and create the rounded stars.

Conclusion
In this tutorial, we used mostly the Brush Engine and Layer Styles. It's amazing what you can do using only those two features! Here we created clouds but by changing some settings, we can create a completely different effect.

0 comments:
Post a Comment